
Recently we have been made aware that after a fresh download of the popular FTP software FileZilla, our AntiVirus software has analysed files in the download and labelled them as potential malware.
Although this has been largely reported as a false positive and is being linked to a PUA (Potentially Unwanted Application) within the software bundle being offered by FileZilla, PUA’s have been known to potentially compromise security and the privacy of the user.
Here at Pipe Ten, we take this information very seriously and are encouraging customers to move onto a software which we feel is more secure, but still has the same usability and performance as FileZilla, as well as a somewhat familiar and easy to use interface.
- Download and Install Cyberduck here
- Locate the FTP details you’ll need to connect to the server. These are:
- FTP Username (This can be different or shorter than your control panel username).
- FTP Password (This is by default the same as your control panel password but if modified will be different).
- FTP Host name (This is the server/host name on which your account resides)
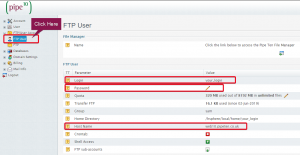
The main FTP account details were sent with your welcome email after signup but you can also find these details from within the control panel by navigating to FTP/User Account > FTP User as shown below. You can also reset your FTP Password from the same location or by following these FTP password reset instructions
3. Click on the ‘Open Connection’ icon. Once the window has popped up, enter your information collected from the above step into the appropriate fields. Once you have done so, you can proceed to click ‘Connect’.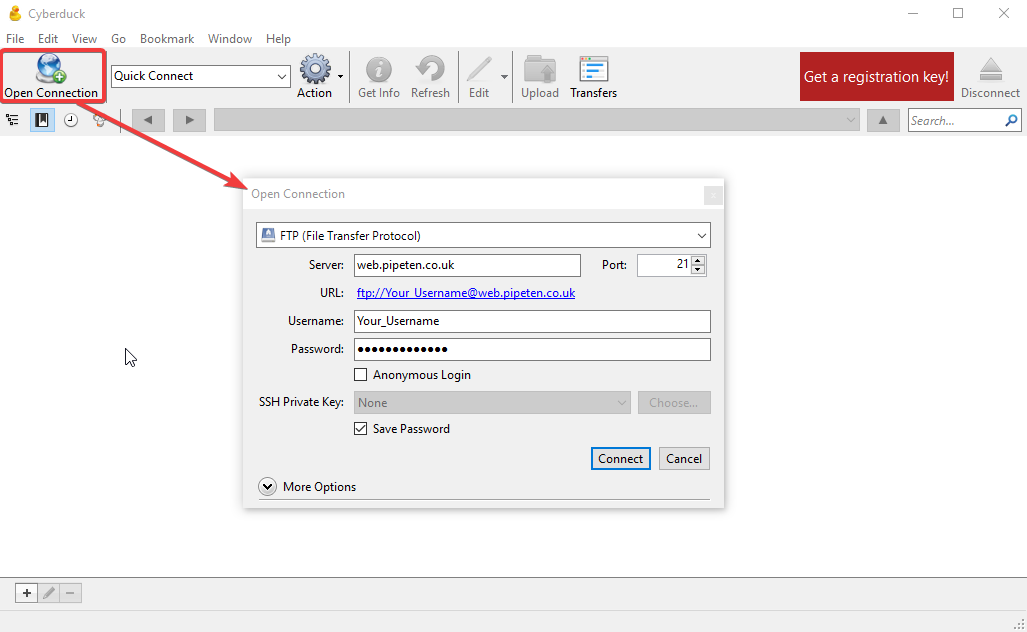
4. After a successful connection, your files will be shown in Cyberduck’s file browser. Cyberduck usually opens its built in file browser automatically upon connection, however if you find that this is not the case, make sure you are on the file browser window by clicking the icon highlighted in red below.
5. To access your local file browser to use in unison with Cyberduck, you must use the ‘Upload’ feature, which you can gain access to by clicking the corresponding icon located on the toolbar. The shortcut to open your machine’s file browser so that you can upload files through Cyberduck is simply to press Alt + Up on your keyboard.
![]()
- You can now choose the files that you wish to upload from your machine. Simply use the window the same way you would Windows File Explorer.
- To upload a singular file, simply go to the directory it is located in and double click the file you wish to upload.
- To upload multiple files at once, simply drag a window around them to highlight them with the cursor, or you can select specific groups of files by holding ‘Ctrl’ on your keyboard and proceeding to click, highlighting all the files you wish to be uploaded. Click ‘Choose’ or press ‘Enter’ to begin the upload.
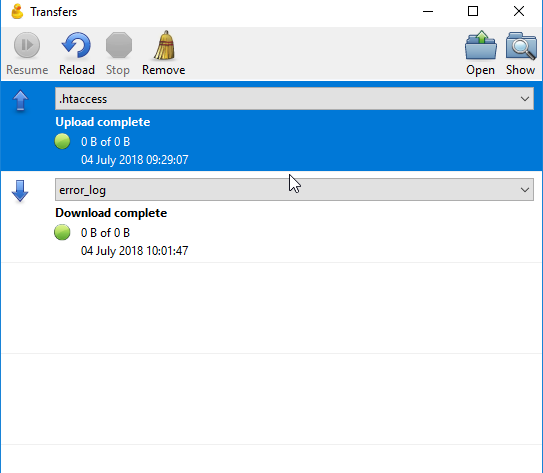
- Once you have selected the files you wish to upload/download through Cyberduck’s file browsers, you will be greeted by the Transfers Window (shown below), which will allow you to monitor the progress of the files you are uploading/ downloading. After completion, it will give you a notification and the process can be viewed as ‘Upload/Download Complete’ within the Transfers Window.
8. When you have finished using Cyberduck, to safely and securely confirm you are no longer connected to the server, simply click on the ‘Disconnect’ icon on the top right of Cyberduck’s window, or press ‘Ctrl + Y’. 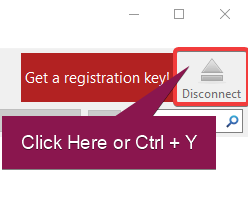
Note: Although the steps above solely cover connection and FTP transfer methods, there are also many more uses for Cyberduck. For full setup of Cyberduck, support with Cyberduck products and for more information, please feel free to visit the sites listed below.
HelpWiki – https://trac.cyberduck.io/wiki/help/en
FAQ – https://trac.cyberduck.io/wiki/help/en/faq
Make sure your version is up to date – https://cyberduck.io/changelog/

Classification: Public
Last saved: 2021/05/19 at 15:44 by Jamie