
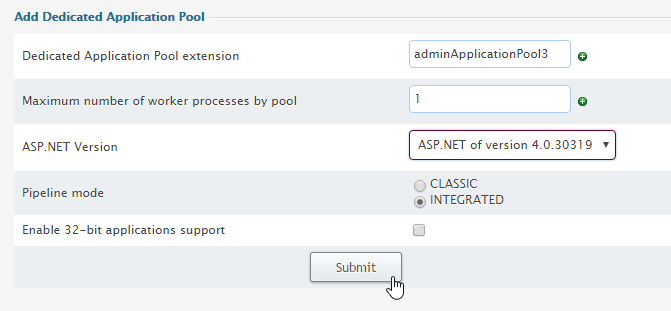
- Extension will be used for pool name. For instance, if your account name is user, extension is test, the newly-created application pool will be named usertestAppPool.
- Maximum number of worker processes can be restricted by administrator.
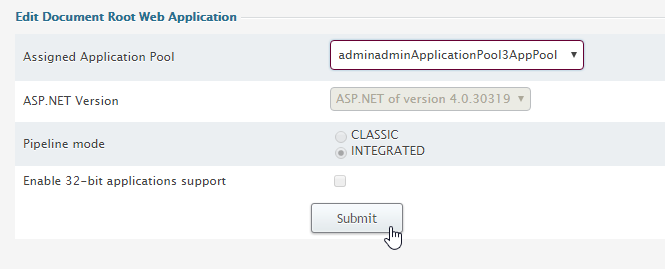
- ASP.NET version specifies ASP.NET version for assigned web applications.
- Pipeline mode allows to select between INTEGRATED (if you want to use the integrated IIS and ASP.NET request-processing pipeline) and CLASSIC (if you want to use IIS and ASP.NET request-processing modes separately) modes. INTEGRATED mode is available only if some version of ASP.NET is selected, because it has no sense without ASP.NET.
- 32-bit applications support allows execution of 32-bit applications on 64-bit hosts. 32-bit applications support cannot be disabled if ASP.NET version 1.1 is selected, because 64-bit ASP.NET runtime is not available prior to 2.0 version.
Setting up and assigning a dedicated application pool to a domain
-
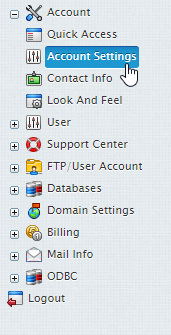
- Click Account > Account Settings.
-
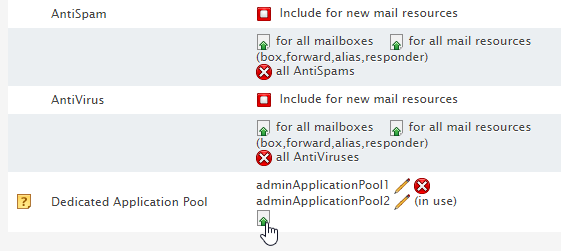
- Within the Dedicated Application Pool section click the Add icon.
-
- Enter your new dedicated application pool name, select the appropriate .NET version and Pipeline mode. Most applications will require you to untick Enable 32-bit application support. Click submit.
-
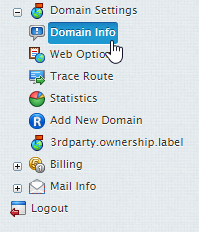
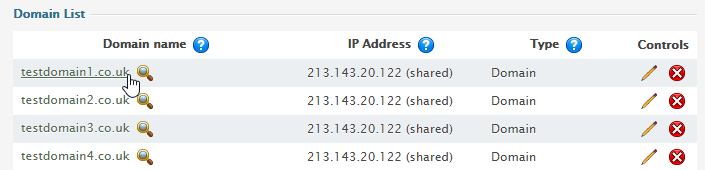
- Now we need to add the application pool to our domain. Navigate to Domain Settings > Domain Info.
-
- Select the domain you wish to apply the dedicated application pool too.
-
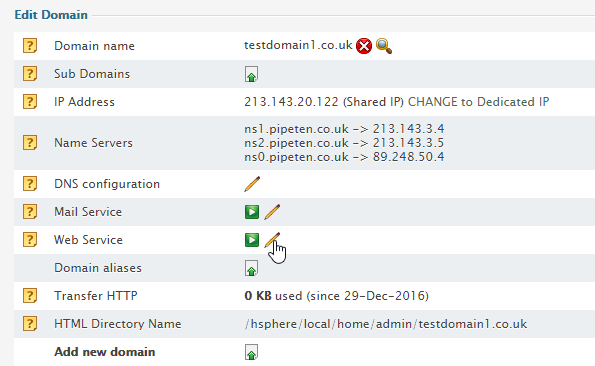
- Within the Web Services section, click the edit icon.
-
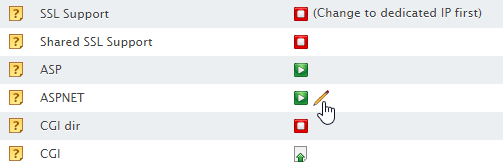
- Ensure that ASPNET is enabled and click the Edit icon.
-
- Select your new application pool from the drop down and click Submit.

Classification: Public
Last saved: 2021/11/11 at 14:21 by Jamie