
Creating a Web Directory on an existing domain:
-
- Within the navigation go-to Domain Settings > Domain Info.

-
- Click the Edit icon next to your domain.
-
- Locate the text Web Service and click the Edit icon next to it.

-
- Click the Edit Icon next to Web Directories Settings

-
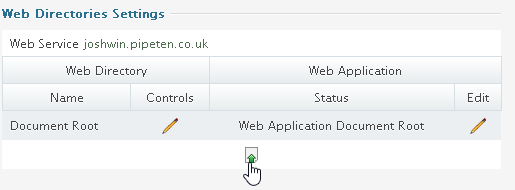
- You should now see the default Web Directory and Web Application for your chosen domain. Click the Add icon at the bottom of the page.
-
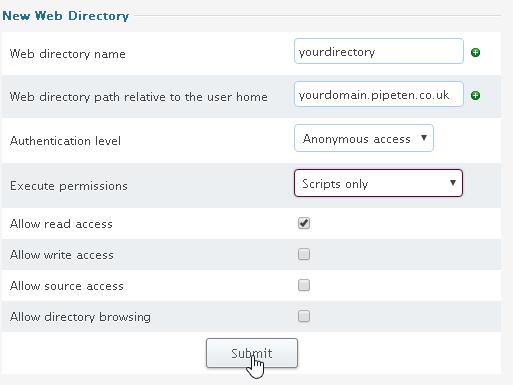
- You will now be on the New Web Directory page
- Web Directory Name: Enter the name you wish the directory to be called
- Web directory path relative to the user home: insert the path name you wish to use here, e.g. yourdomain.co.uk\directory
- Leave all other items as default and click Submit.
- You will now be on the New Web Directory page
Creating a Web Application on an existing domain:
-
- Within the navigation go-to Domain Settings > Domain Info.
-
- Click the Edit icon next to your domain.
-
- Locate the text Web Service and click the Edit icon next to it.
-
- Click the Edit Icon next to Web Directories Settings
-
- You should now see the default Web Directory and Web Application for your chosen domain. Click the Add icon at the bottom of the page.
-
- You will now be on the New Web Directory page
- Web Directory Name: Enter the name you wish the directory to be called
- Web directory path relative to the user home: insert the path name you wish to use here, e.g. yourdomain.co.uk\directory
- Leave all other items as default and click Submit.
- You will now be on the New Web Directory page
-
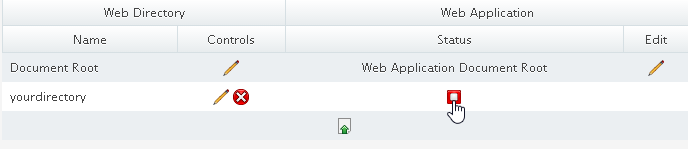
- Click the Off button under ‘Web Application’ -> ‘Status’ next to the web directory that was created.
-
- On the page that appears, select your Application Pool
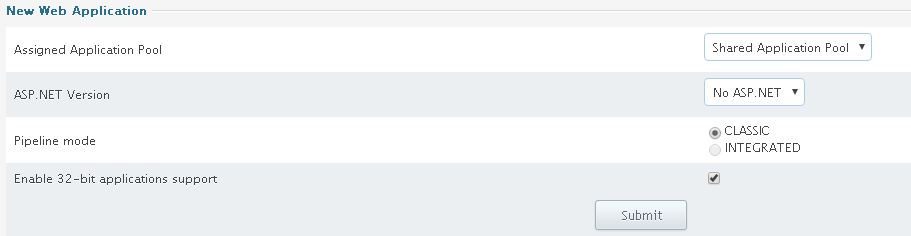
In Windows 2003: Choose Application Pool from the drop-down box and click Submit.
In Windows 2008: Choose Application Pool from the drop-down box, specify application pool parameters if Shared Application pool is chosen, click Submit.
You can edit and delete web applications.
Note: Applications with different versions of ASP.NET enabled cannot run in the same application pool, either dedicated or shared.
In Windows 2003, changing ASP.NET version for an application from a shared pool will automatically move it to another predefined shared pool. Parallels H-Sphere will not allow you to change ASP.NET version to, for instance, 1.1 if the application is run in a dedicated pool which has other applications with ASP.NET 2.0.
In Windows 2008, if ASP.NET is enabled for web application, you can select dedicated application pool with ASP.NET support or select ASP.NET version for shared application pool. If ASP.NET is disabled for web application only dedicated application pools without ASP.NET support are available for selection and the only available option for shared application pool is 32-bit applications support.

Classification: Public
Last saved: 2021/11/11 at 14:23 by Jamie