

With over 375,000 installations, Umbraco is one of the most deployed Windows based CMS’s on the web. This guide will outline how to install Umbraco on your domain in 10 easy and straight forward steps.
Prerequisites
- Download the latest version of Umbraco.
- Add a Primary, Sub, or Third Level Domain to your hosting control panel.
- Upload the unzipped contents of your Umbraco install to your domain folder via FTP.
Steps to take:
-
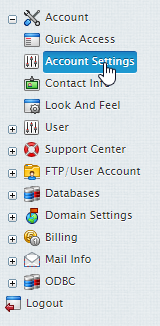
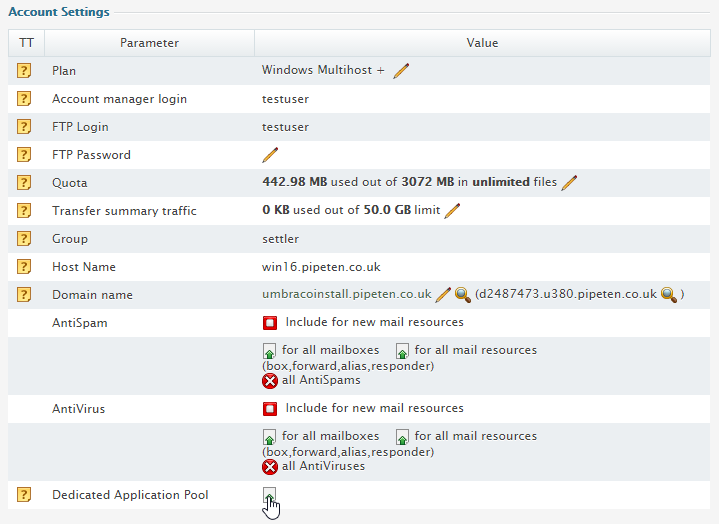
- If you don’t already have a dedicated Application pool, Navigate to Account > Account Settings.
-
- Select the Add icon in the Dedicated Application Pool section.
-
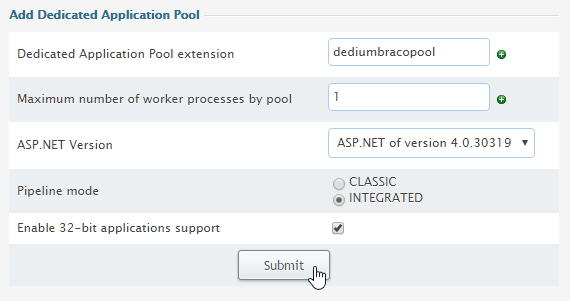
- Name your application pool, select ASP.NET of version 4.0.30319 from ASP.NET version section, and check the INTEGRATED radio-box within Pipeline Mode. Click Submit.
-
- Agree to any charges if applicable.
-
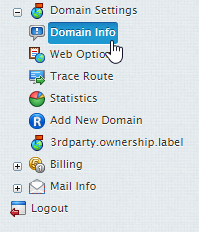
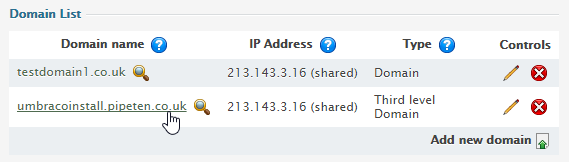
- Navigate to Domain Settings > Domain Info
-
- Select the Domain you wish to install Umbraco on.
-
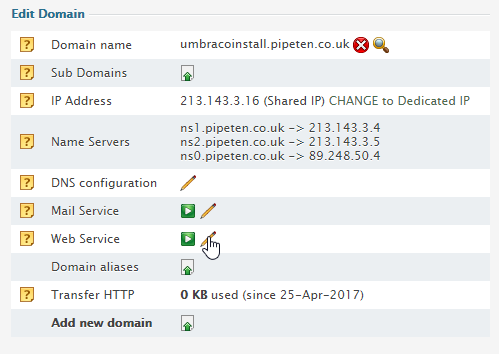
- Click the edit icon in the Web Services field.
-
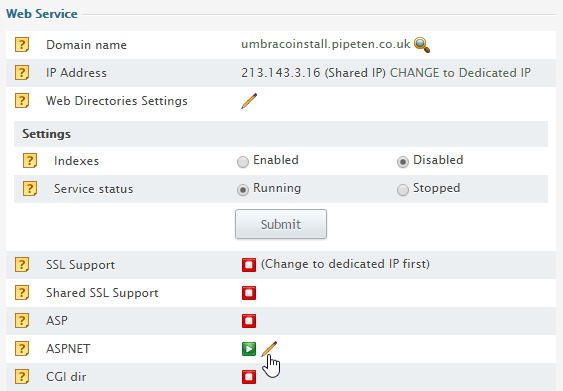
- Click the Edit icon in the ASP.NET field.
-
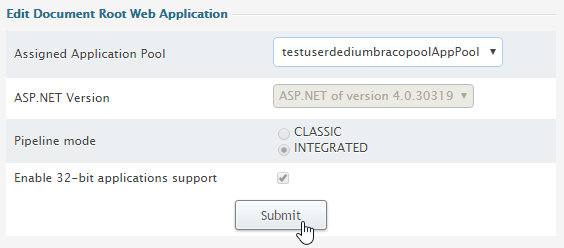
- Select your dedicated application pool from the Assigned Application Pool drop-down menu and click Submit.
-
- Navigate to your domain and input a Username, Email, and Password into the relevant fields. Click Install.
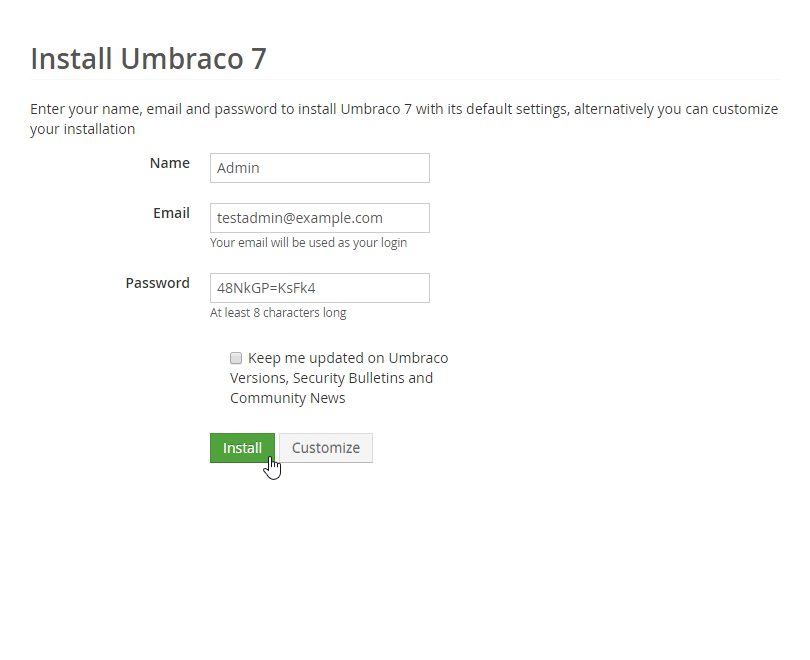
That’s it. Your new Umbraco site will be set up and running ready to be customised!

Classification: Public
Last saved: 2019/08/15 at 14:16 by Jamie