
![]()
With the recent implementation of PHP 5.6 & PHP 7 it is now possible to install Magento 2 on your account. This guide will walk you through the Magento 2 installation steps to get you set up quickly and hassle free.
Prerequisites
-
- Download the latest version of Magento 2. You will need to register a free account with the Magento team to get a download link.
- If you haven’t already, add the domain to your hosting control panel.
- Once downloaded, Unzip the contents of the file and upload to your domain folder via FTP.
- From your control panel, set the PHP version to version 5.6 or later.
- Create a MySQL database and user with dba permissions.
Magento 2 Installation Steps
-
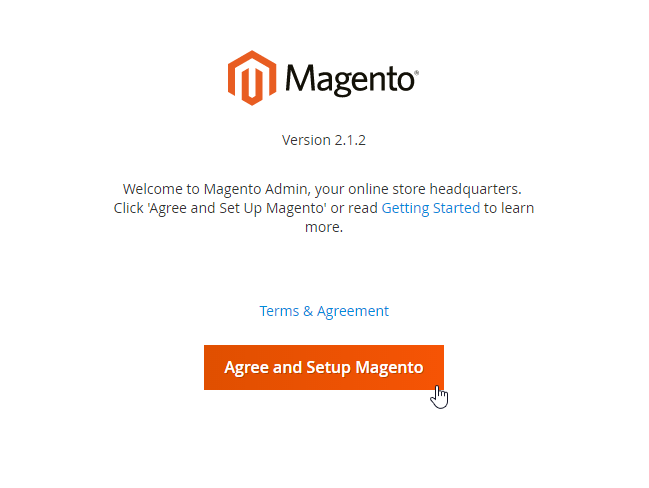
- Navigate to your domain e.g. yourdomain.co.uk/setup/ and click Agree and Setup Magento.
-
- Run the Readiness Check.
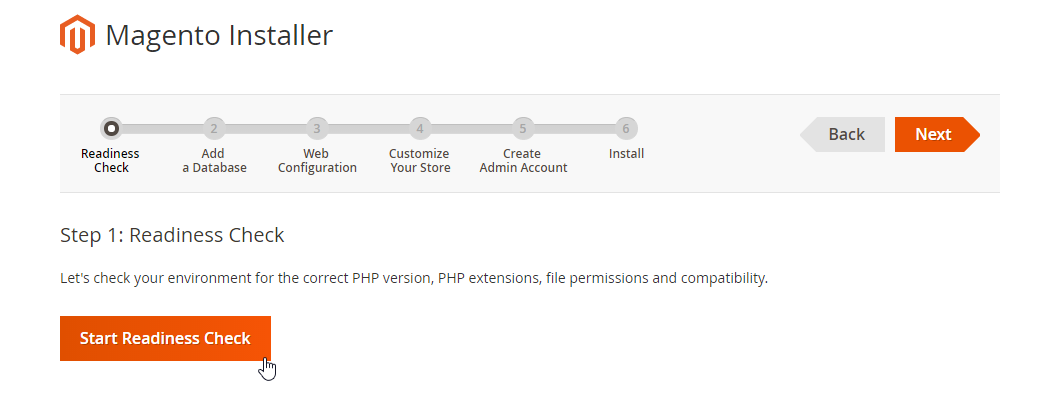
Please note: If you are using PHP 5.6, the following line will need to be placed at the very top of your .htaccess file
php_value always_populate_raw_post_data -1
If for some reason your domain fails the readiness check, please put in a support ticket.
-
- Click the Next button.

-
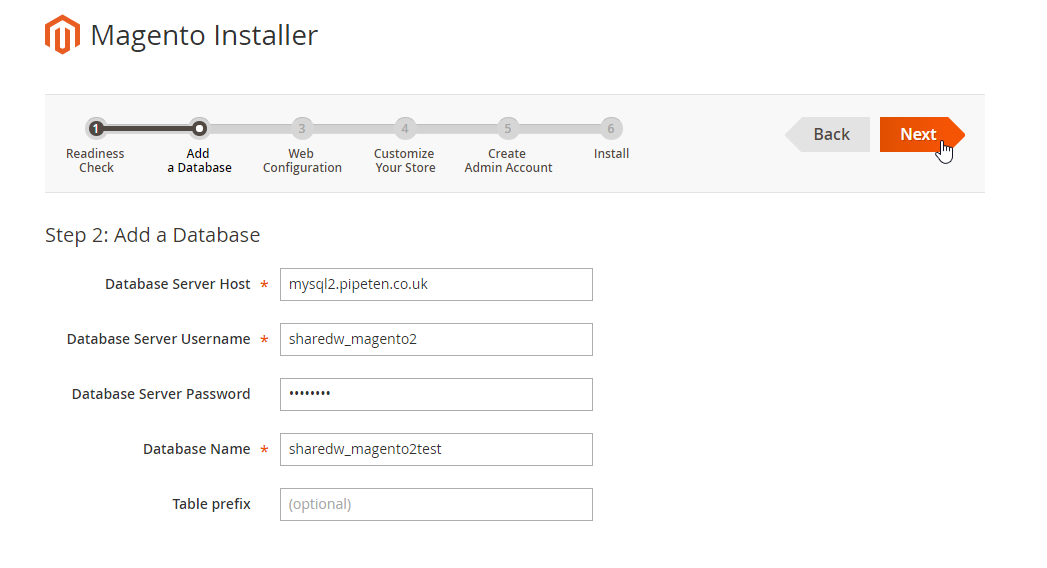
- Enter the relevant information from the database you created earlier and click the Next button.
-
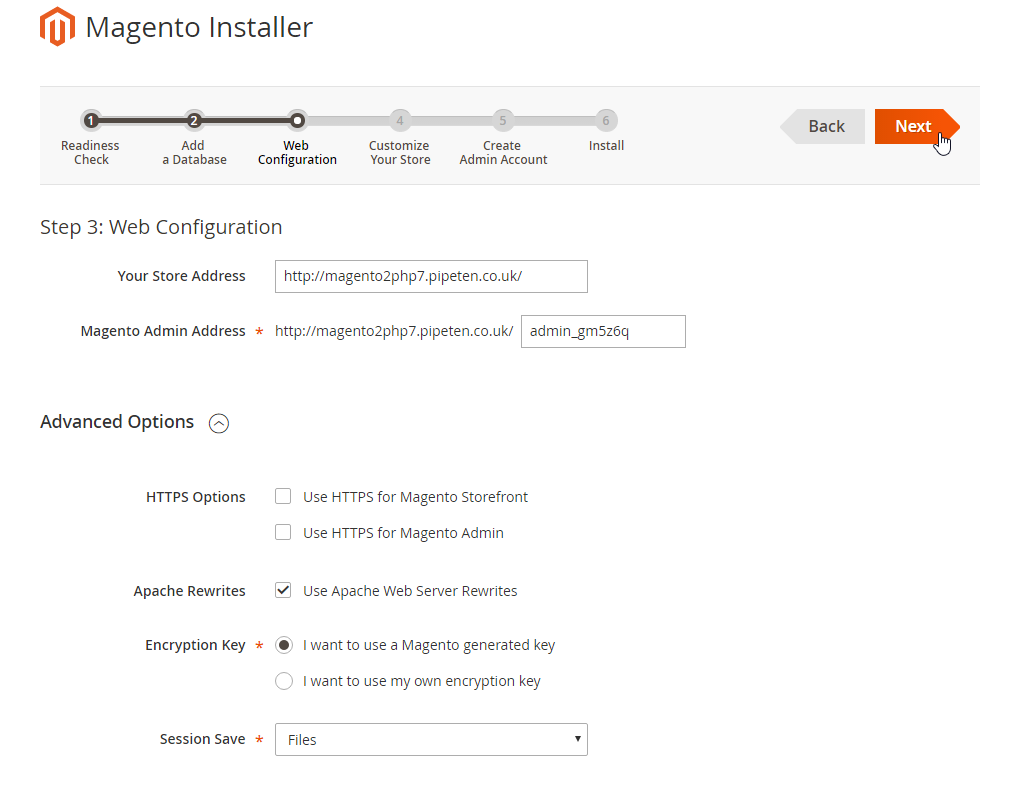
- Take note of the admin URL here for later use. Alternatively you can change the URL you access the admin page from if you would like something different. Once you are happy, click the Next button.
-
- At this stage, choose any additional components you wish to install on your website. Once you have done this click the Next button.
-
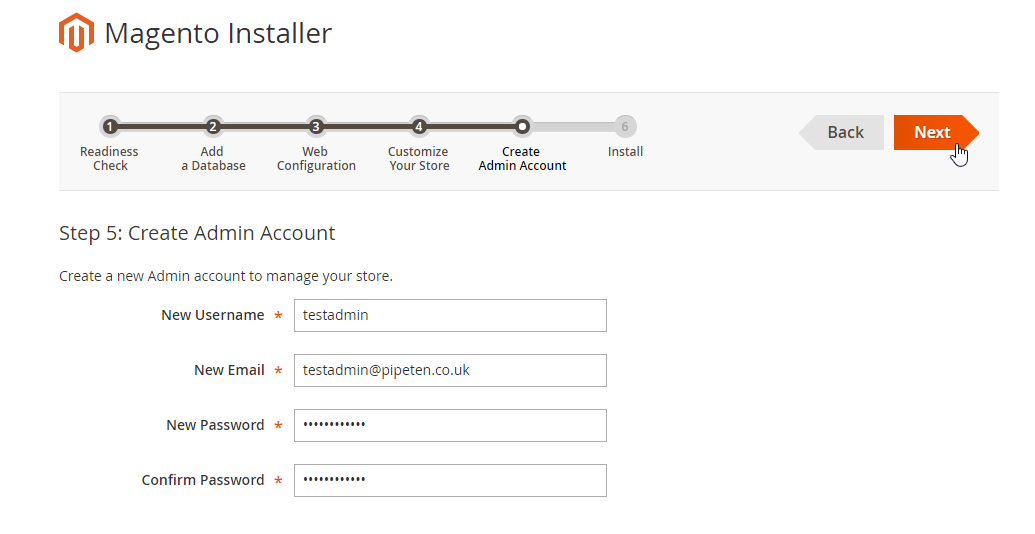
- Set the admin details you wish to login to the backend of your site with. Click Next.
-
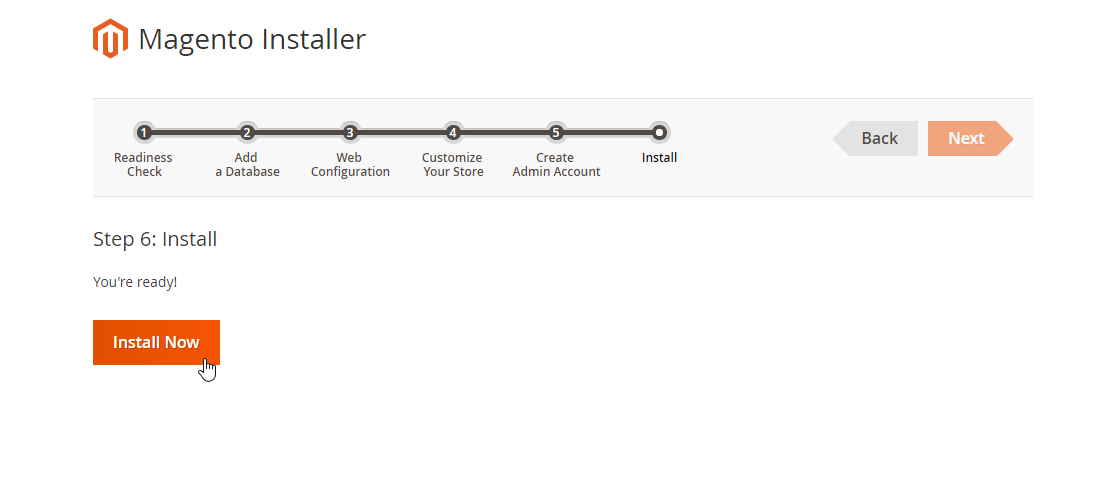
- Click the Install Now button and wait for the installation to complete
Additional Setup steps
Upon your first login to the backend of your new magento site, you may notice the following System Message

To fix this issue you will need to do the following steps:
-
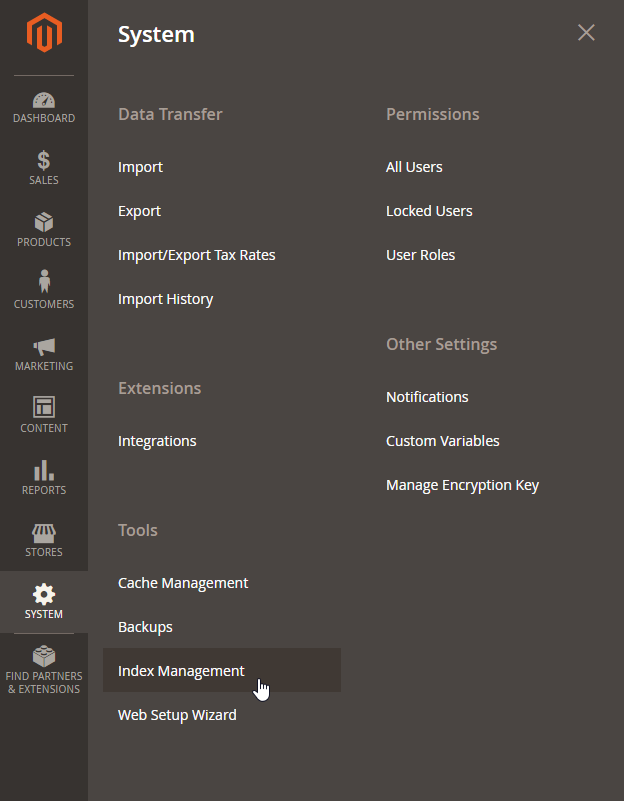
- Navigate to System > Index Management
-
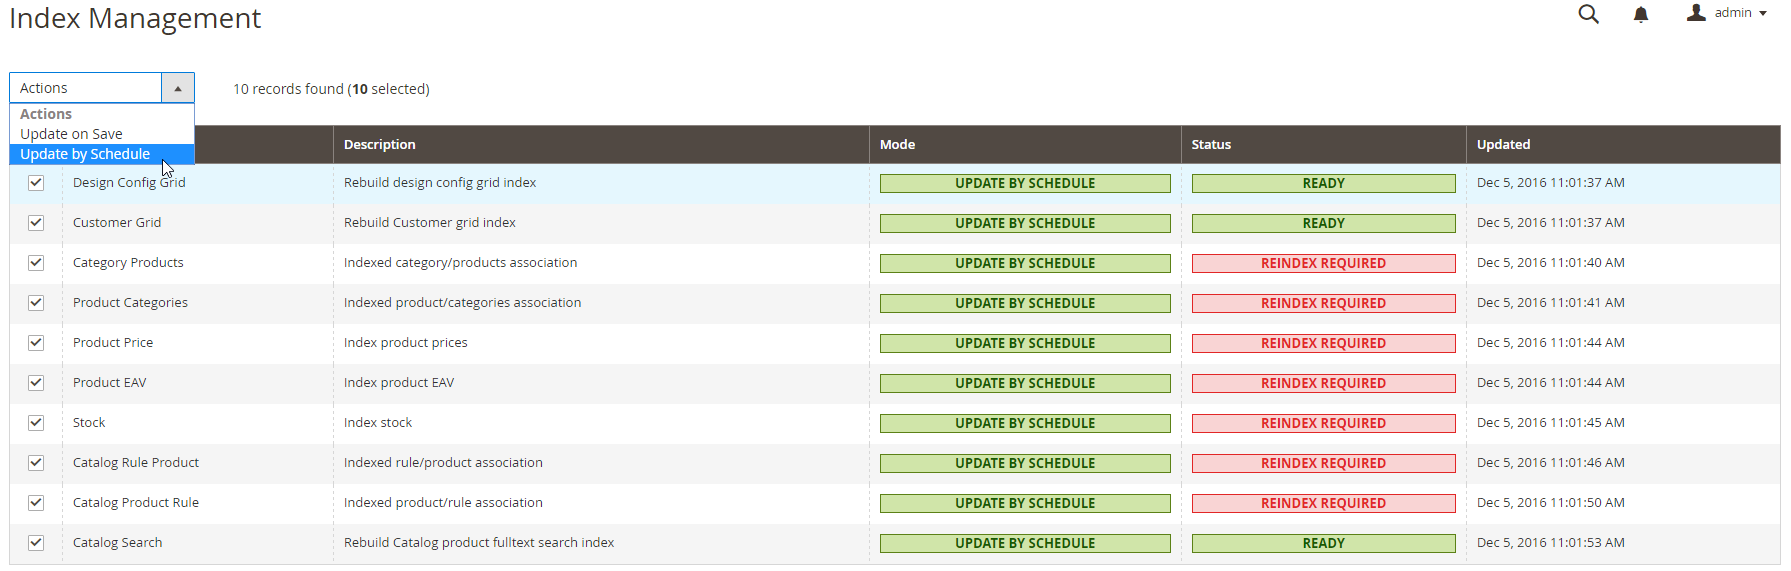
- Select all of the items, click the drop down menu and select Update by Schedule > Save
Click to open in a new tab
-
- Set up a Crontab with the following code format
0 6 * * * /hsphere/shared/php7/bin/php-cli /hsphere/local/home/USERNAME_HERE/DOMAIN_FOLDER_HERE/bin/magento indexer:reindex >/dev/null 2>&1
The above can be changed to a different interval, however increasing the frequency will result in higher resource usage
-
- Once the cron has occured, re-navigating to System > Index Management will show the following
 Click To open in a new tab
-
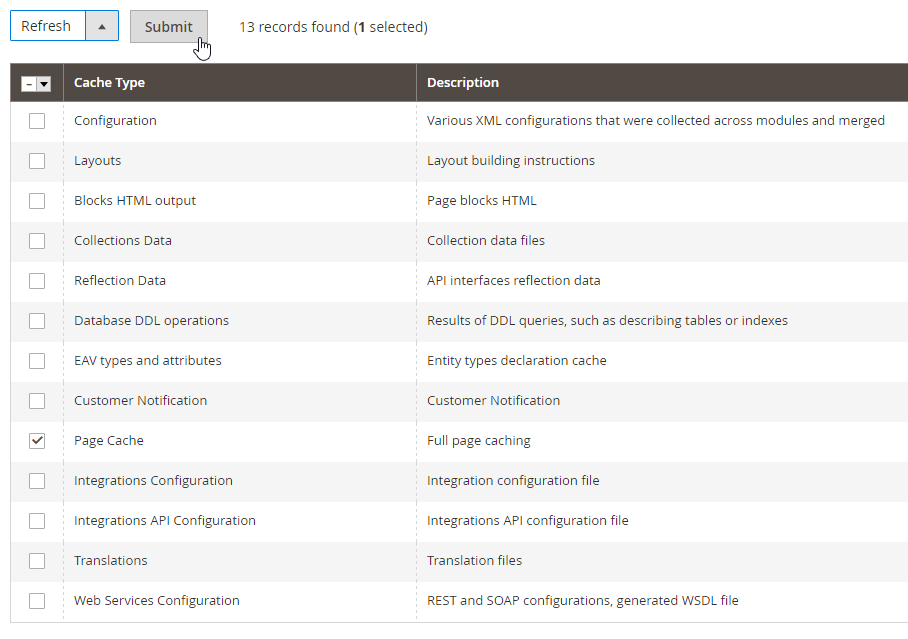
- Finally, to fix the Invalidated Page Cache. Simply select it from the left hand side, select Refresh from the drop down menu and select Submit
That’s it! Your Magento 2 site should be up and running ready for your new customers.

Classification: Public
Last saved: 2023/07/05 at 13:49 by Jamie