
Once you have finished installing a local installation of phpMyAdmin, you can start to use it’s database management services. This guide will give you a run through of how to add a New User and create a New Database in the process, as well as how to add a New User with privileges to access an Existing Database.
Note: This is for self managed customers only. Please do not follow this guide if you do not manage your own server.
Adding a New User with a New Database
- Login to phpMyAdmin via your installation URL e.g. yourdomain.com/phpmyadmin
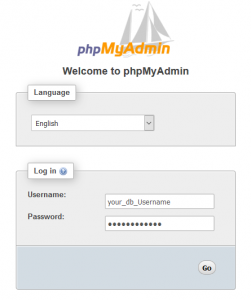
- You should be greeted by this page upon successful login. To access the area used to Create a New User, you will need to click on the Users tab towards the top of the page.

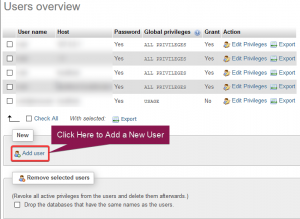
- Once you have done so, a page similar to the one below should appear. To start the process of adding a new user, just click on the Add User link.
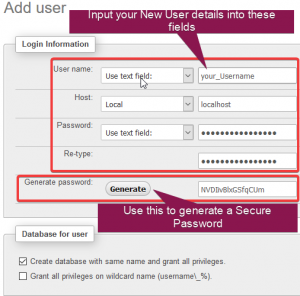
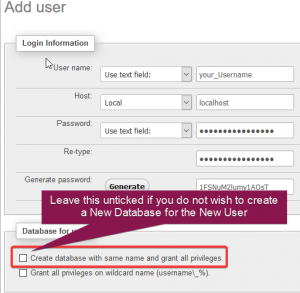
- The Add User page shown below should now be on your screen. There should be separate fields corresponding with different details for a New User. These will be required for creation. You just need to input the information that you wish to use for the new user into the appropriate fields.
If you wish to Generate a password, this will automatically fill in the Password and Retype fields with the newly generated password once you click Generate.
Make sure to tick the Create database with the same name and grant all privileges box to create a new database linked to the new user.
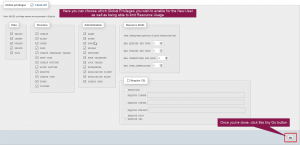
There’s a section below this one that covers Global Privileges and Resource Limits if you wished to make any changes to these. Once you’ve finished click the Go button.
- After you have clicked Go, you should be greeted by a You have added a new user message. This will also be followed by a copy of the query used to create this user. It may be a good idea to keep a copy of this for future reference.

Once you have followed the steps above, you should have successfully added a new user and also created a new database for the user to use.
Adding a New User to an Existing Database
- Login to phpMyAdmin via your installation URL e.g. yourdomain.com/phpmyadmin
- You should be greeted by this page upon successful login. To access the area used to Create a New User, you will need to click on the Users tab towards the top of the page.
- Once you have done so, a page similar to the one below should appear. To start the process of adding a new user, just click on the Add User link.
- The Add User page shown below should now be on your screen. There should be separate fields corresponding with different details for a New User. These will be required for creation. You just need to input the information that you wish to use for the new user into the appropriate fields.
If you wish to Generate a password, this will automatically fill in the Password and Retype fields with the newly generated password for you once you click Generate.
Make sure to leave the checkboxes unticked in order to not create a new database with the new user.
There’s a section below this one that covers Global Privileges and Resource Limits if you wished to make any changes to these. Once you’ve finished click the Go button.
- After you have clicked Go, you should be greeted by a You have added a new user message. This will also be followed by a copy of the query used to create this user. It may be a good idea to keep a copy of this for future reference.
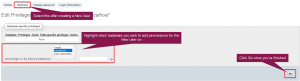
- Now you need to specify which database you’re giving the user permissions to. You can do this by clicking the Database tab, which should show a similar layout to the image below. Once you’ve selected the database you wish give the user privileges to access, simply click Go.
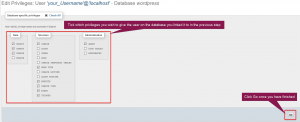
- Once you have followed the step above, you should find yourself on the page where you can Edit Database Specific Privileges by using a check-box system. An example similar to what you should see can be seen below. Click Go once you have finished selecting the database specific privileges you wish to give the new user.
If successful, you will see a message similar to You have updated the privileges for ‘your_Username’@’localhost’ followed by the query used to do this, as shown below.


Classification: Public
Last saved: 2019/11/27 at 16:03 by Jamie