

With over 75 Million downloads, Joomla! is an excellent open source CMS to provide amazing flexibility to your website. This guide will outline how to install Joomla! on your domain in 8 easy and straight forward steps
Prerequisites
- Create a database and a user with dba permissions, ensuring that the password hash is set to Long, PHP5.x only.
- Download the latest version of Joomla! and extract it to your desktop.
- Upload the contents of the extracted folder to your domain via FTP
- Set your domain to use PHP 5.3+
Steps to take:
-
- Visit your domain from your web browser
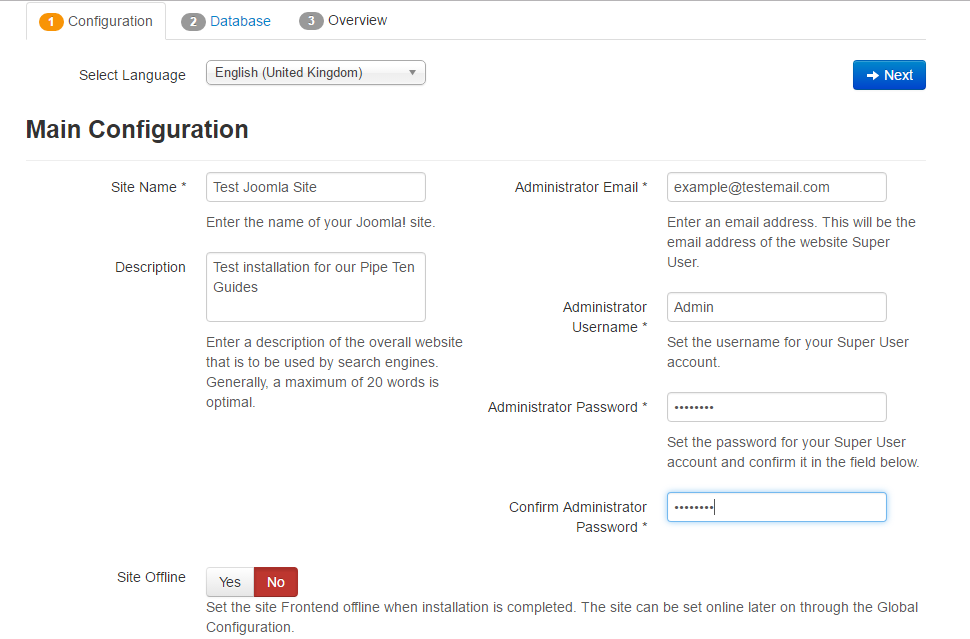
- Fill in the Main Configuration options and click the Next button.
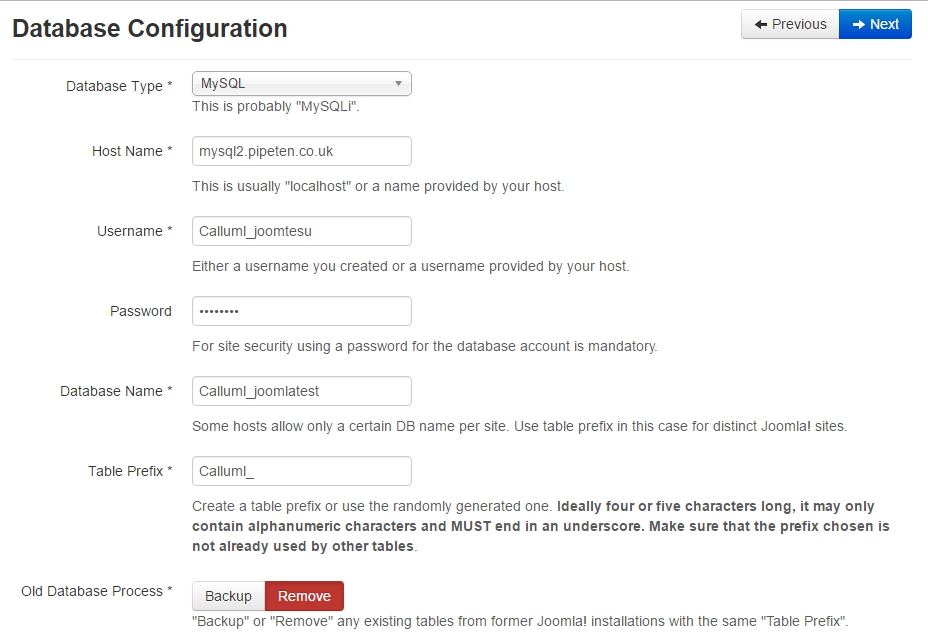
- Select MySQL from the Database Type
- Input your database details:
-
-
- Host name: Place your Database server here.
You can locate what database server you are on by Navigating to Databases > MySQL > MySQL DB’s and viewing the entry Hostname. - Username: Place the database username you created earlier.
- Password: Place the database password you created earlier.
- Database Name: Place the name of the database you created earlier here.
- Table Prefix: Place the table prefix here, in my case this is Calluml_.
- Old Database Process: This can be set to remove unless you are using an old database
- Host name: Place your Database server here.
-
-
- Click Next
- Double check the final settings. If you wish for any sample data to be installed here, select it now. Press Install
- Once finished, you should see the following screen:
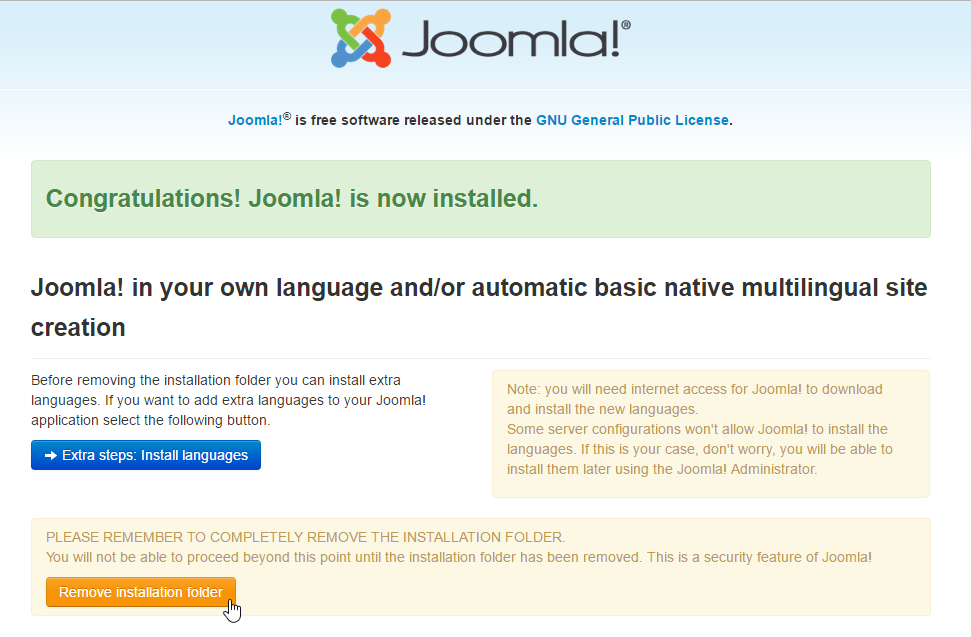
Finally press the Remove installation folder button
That’s it! Visiting your domain should now show your new website. To reach the backend of your website simply navigate to http://yourdomain.com/administrator/.

Classification: Public
Last saved: 2022/10/05 at 12:10 by Jamie